Show timeline in seconds in Premiere Pro
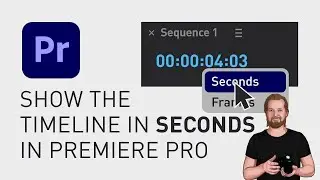
If you want to see your playhead position in seconds instead of frames in Adobe Premiere Pro, all you have to do is to go up to the top of your timeline window, and next to the name of your sequence, you click the little hamburger menu.
Now make sure that “Show Audio Time Units” is unselected, otherwise you will get a lot of numbers that you don’t need.
So unselect that and then right click on the numbers at the top left of the timeline window and click the alternative where it says “FPS” or you can hold down “cmd” (or “ctrl” on PC) and just left-click on the numbers to toggle between “frames” and “seconds” and if you just do a simple left-click, you can type in a certain time in your sequence that you want your playhead to move to.
The numbers stands for hours, minutes, seconds and hundreds of a second.
For hundreds of tutorials like this, don’t forget to subscribe and download the free motion graphic templates, in the comment section below. See you soon!
**********
EXCLUSIVE RESOURCES FOR VIDEO CREATORS:
🎞 FREE (and paid) digital products for video creators:
https://davidlindgren89.gumroad.com/
🎁 FREE browser extension for YouTube Growth:
https://www.tubebuddy.com/davidlindgr...
🎵 2 extra months of music library "Artlist" for FREE:
https://artlist.io/David-121249
🧠 Learn more about Adobe Premiere Pro:
• How to move clips with the keyboard i...
🧠 Learn more about Adobe After Effects:
• How to edit in Adobe After Effects - ...
**********
📲 CONNECT WITH ME HERE:
► / davidlindgren89
► / davidlindgren89
► / davidlindgren89
► / davidlindgren89
► / davidlindgren89
**********
DISCLAIMER: This video and description might contain affiliate links, meaning if you click any of the product links, I'll receive a small commission. This helps support the channel and allows me to continue making videos like this. Thank You for your support! 🙏
(All links are my genuine recommendations.)
#AdobePremierePro #PremierePro #Tutorials #HowTo

![[PuppetConf 2014][Modules] Test Driven Development with Puppet - Gareth Rushgrove, Pupp...](https://pics.providosiki.ru/watch/Rk4DSuwA-Y4)




![Lonely Night - เป๊ก ผลิตโชค - [ piano cover by KruNatt ]](https://pics.providosiki.ru/watch/vskRiD9bC7Q)


